linux+Nginx+Mysql+Php图示,操作步骤详解!,nginxmysql
linux+Nginx+Mysql+Php图示,操作步骤详解!,nginxmysql
LNMP简介
LAMP(Linux apache mysql php)---比较早的web服务。
LNMP(Linux nginx mysql php)---比较潮流,新的webn服务,使用率上升趋势(国内非常流行)。
Nginx(Engine X),是俄罗斯人开发的,开源的www服务软件,软件一共780K(非常小),是一款静态(html,js,css,jpg等)www软件,静态小文件高并发,同时占用资源很少。
Nginx使用平台(linux unix windows都可以)和apache一样。
Nginx的功能:
a.www web服务---http 80
b.负载均衡(反向代理proxy)
c.web cache
nginx的优点:
1.配置简单,灵活。
2.高并发(静态小文件),静态1-2W。
3.占用资源少,2W并发开10个线程服务,内存消耗几百兆。
4.功能种类比较多(web cache proxy代理),每个功能都不是很强。
5.支持epoll模型,使得nginx支持高并发。
6.nginx配合动态服务和apache有区别。
7.利用nginx可以对IP限速。可以限制连接数。
实现原理:nginx(apache)--》php--》mysql
nginx的应用场合:
1.静态服务(图片,视频),另一个lighttpd(社区不活跃)。并发:1-3W,html、js、css、.flv
2.动态服务:nginx+fastcgi方式运行php,jsp。并发:500-1500,类似于apache+php,lighttpd+fcgi php
3.反向代理,负载均衡。日PV2000W以下,都可以用nginx做代理。haproxy,F5,a10
4.缓存服务,SQUID,VARNI.
nginx和其它web服务器对比:
1)apache
a.稳定强大
b.Prefork模式取消了进程创建开销,性能很高。
c.处理动态业务数据时,因关联到后端的引擎和数据库,瓶颈不在apache本身
d.高并发时消耗系统资源相对来说多一些
e.基于传统的select模型
2)nginx
a.基于异步IO模型(epoll,kqueue),性能强,能够支持上万并发
b.对小文件支持很好,性能很高(限静态小文件)
c.代码优美,扩展库必须编译进行主程序
d.消耗资源相对低
3)Lighttpd(百度贴吧,豆瓣)
a.基于异步IO模型,性能和nginx相近
b.扩展是SO模式,比nginx要灵活
c.全球使用率较低,安全性没有apache以及nginx好
d.通过插件(mod secdownload)可实现文件URL地址加密
企业生产场景如何选择web服务器(推荐):
静态业务:高并发,用nginx或lighttpd
动态业务:采用nginx和apache均可
既有动态又有静态业务:nginx和apache都可以,单选
对外业务nginx,对内业务apache
安装,配置nginx
1.安装准备:[root@localhost ~]# yum install pcre* -y
[root@localhost ~]# yum install openssl* -y
2.编译:
./configure --prefix=/application/nginx1.12.0 \
--user=nginx \
--group=nginx \
--with-http_stub_status_module \
--with-http_ssl_module
3.启动检查:
[root@localhost application]# /application/nginx/sbin/nginx -t
nginx: the configuration file /application/nginx1.12.0/conf/nginx.conf syntax is ok
nginx: configuration file /application/nginx1.12.0/conf/nginx.conf test is successful
[root@localhost application]# /application/nginx/sbin/nginx
[root@localhost application]# netstat -lntup|grep nginx(另外80端口也可以查)

出现这个界面表示成功
[root@localhost application]# vim /application/nginx/html/index.html 修改主页内容
4.关于nginx模块
1)Nginx core modules(必须的),包括Main Events
2)Standard HTTP modules(虽然不是必须的,但是缺省都会安装,不建议改动),包括Core Acess FastCGI Gzip(压缩模块,性能优化) LOG(日志模块) Proxy Rewrite(URL重写模块) Upstream(负载均衡模块)等等
提示:缺省条件下,这两组模块都会安装。修改配置文件,主要是根据这2组模块的功能来修改模块的参数。官网能够查看模块的参数。
5.nginx的配置
[root@localhost conf]# egrep -v "#|^$" nginx.conf.default >nginx.conf(去掉注释#行)
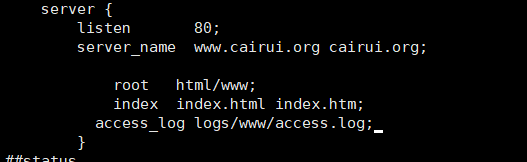
[root@localhost conf]# vim nginx.conf(cairui.org是别名)

[root@localhost conf]# mkdir /application/nginx/html/www
[root@localhost conf]# touch /application/nginx/html/www/index.html
[root@localhost conf]# vim /application/nginx/html/www/index.html
[root@localhost conf]# /application/nginx/sbin/nginx -t
nginx: the configuration file /application/nginx1.12.0/conf/nginx.conf syntax is ok
nginx: configuration file /application/nginx1.12.0/conf/nginx.conf test is successful
[root@localhost conf]# /application/nginx/sbin/nginx -s reload
修改windows本地hosts文件,保证在win命令提示符内能ping通来自虚拟主机,再上网页查看
添加状态的server标签:
[root@localhost conf]# vim /application/nginx/conf/nginx.conf
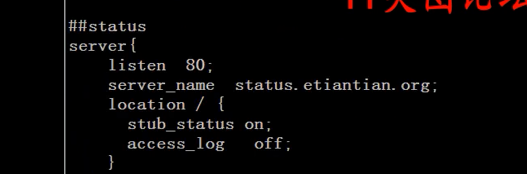
##status
server {
listen 80;
server_name status.cairui.org;
location / {
stub_status on;
access_log off;
}
}
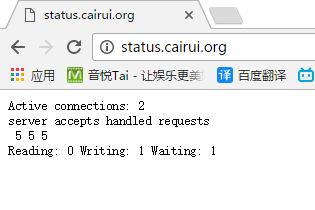
在win本地hosts文件中也要添加,
解决恶意域名绑定:
[root@localhost conf]# vim /application/nginx/conf/nginx.conf(必须放在第一个server)
server {
listen 80;
location / {
deny all;
}
}
开启日志功能:
[root@localhost conf]# cat /application/nginx/conf/nginx.conf.default (找到日志格式)
#log_format main '$remote_addr - $remote_user [$time_local] "$request" '
# '$status $body_bytes_sent "$http_referer" '
# '"$http_user_agent" "$http_x_forwarded_for"';
#access_log logs/access.log main;
拷贝到nginx.conf下,去掉注释

错误日志格式放在最顶端
分析nginx日志的软件:syslog,rsyslog,Awstats,scribe,kafka
Mysql
mysql安装方法:
5.1---编译安装configure,make,make install
5.5---编译安装cmake,make,make install(可以直接用二进制包安装,解压即可)
1.安装mysql
[root@localhost conf]# useradd mysql -s /sbin/nologin -M
[root@localhost tools]# tar xf mysql-5.5.32-linux2.6-x86_64.tar.gz
[root@localhost tools]# mv mysql-5.5.32-linux2.6-x86_64 /application/mysql5.5.32
[root@localhost tools]# ln -s /application/mysql5.5.32/ /application/mysql
[root@localhost tools]# chown -R mysql.mysql /application/mysql/data/
[root@localhost mysql]# ./scripts/mysql_install_db --user=mysql --basedir=/application/mysql/ --datadir=/application/mysql/data/(编译之前需要安装libaio)
[root@localhost mysql]# cp support-files/mysql.server /etc/init.d/mysqld
[root@localhost mysql]# vim /etc/init.d/mysqld

[root@localhost mysql]# cp support-files/my-small.cnf /etc/my.cnf (每个版本的配置文件不同)
cp:是否覆盖"/etc/my.cnf"? y
[root@localhost mysql]# vim /etc/profile

[root@localhost mysql]# service mysqld start
Starting MySQL.. SUCCESS!
[root@localhost mysql]# mysql
数据库优化:
mysql> show databases
mysql> drop Database test;
mysql> select user,host from mysql.user;
mysql> drop user''@localhost;
[root@localhost mysql]# mysql -uroot -pnew-password
修改密码(进入mysql修改)mysql> set password for root@localhost = password('123');
PHP
LNMP下的php:
apache----》libphp5.so
nginx---》fcgi php-fpm port9000(百度)
在安装php之前确保mysql,nginx运行正常[root@localhost mysql]# netstat -lntup|egrep "nginx|mysql"
1.需要安装的软件
安装libiconv(./configure --prefix=/usr/local/libiconv)
安装libmcrypt(不是必须,建议安装)是一个加密的库
./configure
make
make install
sleep2
/sbin/ldconfig
cd libltdl/
./configure --enable-ltdl-install
make
make install
cd ../../cd
安装mhash
./configure
make
make install
sleep 2
cd ../
rm -fr /usr/lib64/libmcrypt.*
rm -fr /usr/lib64/libmhash*
ln -s /usr/local/lib64/libmcrypt.la /usr/lib64/libmcrypt.la
ln -s /usr/local/lib64/libmcrypt.so /usr/lib64/libmcrypt.so
ln -s /usr/local/lib64/libmcrypt.so.4 /usr/lib64/libmcrypt.so.4
ln -s /usr/local/lib64/libmcrypt.so.4.4.8 /usr/lib64/libmcrypt.so.4.4.8
ln -s /usr/local/lib64/libmhash.a /usr/lib64/libmhash.a
ln -s /usr/local/lib64/libmhash.la /usr/lib64/libmhash.la
ln -s /usr/local/lib64/libmhash.so /usr/lib64/libmhash.so
ln -s /usr/local/lib64/libmhash.so.2 /usr/lib64/libmhash.so.2
ln -s /usr/local/lib64/libmhash.so.2.0.1 /usr/lib64/libmhash.so.2.0.1
ln -s /usr/local/bin/libmcrypt-config /usr/bin/libmcrypt-config
安装mcrypt
/sbin/ldconfig
./configure LD_LIBRARY_PATH=/usr/local/lib
make
make install
cd ../
sleep 2
2.安装php
[root@localhost tools]# yum install libxslt* -y
./configure \
--prefix=/application/php5.6.30 \
--with-mysql=/application/mysql \
--with-iconv-dir=/usr/local/libiconv \
--with-freetype-dir \
--with-jpeg-dir \
--with-png-dir \
--with-zlib \
--with-libxml-dir=/usr \
--enable-xml \
--disable-rpath \
--enable-safe-mode \
--enable-bcmath \
--enable-shmop \
--enable-sysvsem \
--enable-inline-optimization \
--with-curl \
--with-curlwrappers \
--enable-mbregx \
--enable-fpm \
--enable-mbstring \
--with-mcrypt \
--with-gd \
--enable-gd-native-ttf \
--with-openssl \
--with-mhash \
--enable-pcntl \
--enable-sockets \
--with-xmlrpc \
--enable-zip \
--enable-soap \
--enable-short-tags \
--enable-zend-multibyte \
--enable-static \
--with-xsl \
--with-fpm-user=nginx \
--with-fpm-group=nginx \
--enable-ftp \
--enable-opcache=no
ln -s /application/mysql/lib/libmysqlclient.so.18 /usr/lib64
报错处理:http://www.68idc.cn/help/jiabenmake/qita/20141114128775.html,,
http://blog.csdn.net/hp6451449/article/details/54746842?locationNum=5&fps=1
3.php配置
[root@localhost php-5.3.27]# cp php.ini-production /application/php/lib/php.ini

直接上传
[root@localhost etc]# /application/php/sbin/php-fpm -t
[root@localhost etc]# /application/php/sbin/php-fpm
开机启动
cat >>/etc/rc.local<<EOF
#nginx+php-fpm by cairui at 2017
/etc/init.d/mysqld start
/application/php/sbin/php-fpm
/application/nginx/sbin/nginx
EOF
[root@134 extra]# cat /application/nginx/conf/extra/bbs.conf
server {
listen 80;
server_name bbs.caimengzhi.org;
root html/bbs;
index index.html index.htmi index.php;
location ~ .*\.(php|php5)?$ #此时不{}内不指定目录的话就直接读取上面html/bbs下的php文件
{
fastcgi_pass 127.0.0.1:9000;
fastcgi_index index.php;
include fastcgi.conf;
}
}
[root@localhost conf]# cd /application/nginx/html/www/
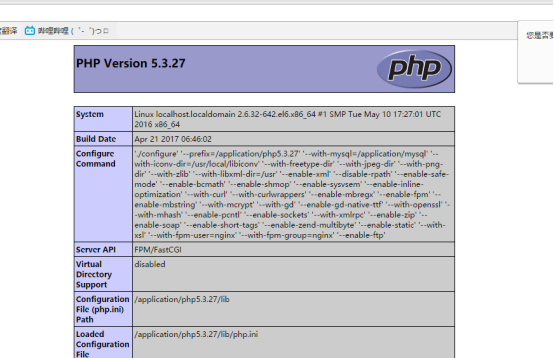
[root@localhost www]# vim index.php
[root@localhost www]# /application/nginx/sbin/nginx -t
[root@localhost www]# /application/nginx/sbin/nginx -s reload
wiki软件
[root@localhost www]# mysql
mysql> create database wiki;
mysql> grant all on wiki.* to wiki@'localhost' identified by 'wiki';
mysql> flush privileges ;
mysql> quit
http://kaiyuan.baike.com/download/(wiki下载HDwiki)
[root@localhost www]# wget http://kaiyuan.hudong.com/download.php?n=HDWiki-v6.0GBK-20170209.zip(注意www)
[root@localhost www]# unzip download.php\?n\=HDWiki-v6.0GBK-20170209.zip
[root@localhost www]# rm -f download.php\?n\=HDWiki-v6.0GBK-20170209.zip
[root@localhost www]# mv hdwiki/* .
[root@localhost www]# cd ../
[root@localhost html]# chown -R nginx.nginx www/
评论暂时关闭