【linux相识相知】网络属性配置,linux相识相知属性
当我们拥有一个崭新的计算机的时候,第一步恐怕都是迫不及待的下载各种软件,看视频,听音乐等,这里的关键的一点是要有网络。现在的个人计算机大部分都是windows操作系统的,接入网络网络很简单,插上网线也许就能上网了,最麻烦不过找到网络和共享中心手动配置一个ip地址、网关地址和dns服务器就能上网了,当然这都是得益于图形化界面。但是现在很多的服务器都是linux操作系统且没有图形化的界面,这时候我们就需要了解怎样正确的给linux主机配置网络属性了,本次博客就来说说以正确的方式打开linux操作系统的网络属性配置(本次博客基于的发行版和版本:centOS7、centOS6.5)。
接入网络的两种方式
一、手动的指定
1.使用命令
一般是临时的修改,重启后失效,如:ifconfig、route、ip addr等。
2.修改配置文件
修改文件配置,永久有效,但是可能不能立即生效,需要重启服务。
二、动态获取
如果本地网路中存在DHCP服务,可以动态的获取到ip地址、网关地址、DNS服务器地址等。
常用的管理和配置命令
一、ifconfig
1.不加任何选项,查看处于活动状态下的接口,-a选项显示所有接口,包括inactive状态的接口:

![]()
[root@localhost ~]#
ifconfig
eth0 Link encap:Ethernet HWaddr 00:0C:
29:9F:AA:AD
inet addr:192.168.
172.136 Bcast:
192.168.
172.255 Mask:
255.255.
255.0
inet6 addr: fe80::20c:29ff:fe9f:aaad/
64 Scope:Link
UP BROADCAST RUNNING MULTICAST MTU:1500 Metric:
1
RX packets:2168 errors:
0 dropped:
0 overruns:
0 frame:
0
TX packets:404 errors:
0 dropped:
0 overruns:
0 carrier:
0
collisions:0 txqueuelen:
1000
RX bytes:149715 (
146.2 KiB) TX bytes:
29251 (
28.5 KiB)
lo Link encap:Local Loopback
inet addr:127.0.
0.1 Mask:
255.0.
0.0
inet6 addr: ::1/
128 Scope:Host
UP LOOPBACK RUNNING MTU:16436 Metric:
1
RX packets:0 errors:
0 dropped:
0 overruns:
0 frame:
0
TX packets:0 errors:
0 dropped:
0 overruns:
0 carrier:
0
collisions:0 txqueuelen:
0
RX bytes:0 (
0.0 b) TX bytes:
0 (
0.0 b)
[root@localhost ~]#
ifconfig -
a
eth0 Link encap:Ethernet HWaddr 00:0C:
29:9F:AA:AD
inet addr:192.168.
172.136 Bcast:
192.168.
172.255 Mask:
255.255.
255.0
inet6 addr: fe80::20c:29ff:fe9f:aaad/
64 Scope:Link
UP BROADCAST RUNNING MULTICAST MTU:1500 Metric:
1
RX packets:2223 errors:
0 dropped:
0 overruns:
0 frame:
0
TX packets:425 errors:
0 dropped:
0 overruns:
0 carrier:
0
collisions:0 txqueuelen:
1000
RX bytes:153927 (
150.3 KiB) TX bytes:
32473 (
31.7 KiB)
eth1 Link encap:Ethernet HWaddr 00:0C:
29:9F:AA:B7
BROADCAST MULTICAST MTU:1500 Metric:
1
RX packets:0 errors:
0 dropped:
0 overruns:
0 frame:
0
TX packets:0 errors:
0 dropped:
0 overruns:
0 carrier:
0
collisions:0 txqueuelen:
1000
RX bytes:0 (
0.0 b) TX bytes:
0 (
0.0 b)
lo Link encap:Local Loopback
inet addr:127.0.
0.1 Mask:
255.0.
0.0
inet6 addr: ::1/
128 Scope:Host
UP LOOPBACK RUNNING MTU:16436 Metric:
1
RX packets:0 errors:
0 dropped:
0 overruns:
0 frame:
0
TX packets:0 errors:
0 dropped:
0 overruns:
0 carrier:
0
collisions:0 txqueuelen:
0
RX bytes:0 (
0.0 b) TX bytes:
0 (
0.0 b)
View Code
接口的命名方式:
![]() 1.传统的命令方式:
以太网:eth1,eth2...ethn #centos6较常见的命名方式
PPP网络:ppp1,ppp2...pppn
2.可预测的命令方案
如果固件或者BIOS为主板上集成的设备提供的索引信息可以用,根据此索引进行命令,例如:eno1,eno2....enon;
如果固件或者BIOS为PCI
1.传统的命令方式:
以太网:eth1,eth2...ethn #centos6较常见的命名方式
PPP网络:ppp1,ppp2...pppn
2.可预测的命令方案
如果固件或者BIOS为主板上集成的设备提供的索引信息可以用,根据此索引进行命令,例如:eno1,eno2....enon;
如果固件或者BIOS为PCI-
E扩展槽上所提供的索引信息可以用,根据此索引进行命令,例如:ens1,ens2...ensn;
如果硬件接口的物理位置信息可用,则根据此信息命令,如enp2s0
如果用户显示定义,也可以根据MAC地址命令,例如enx1232131231
3.命名格式的组成
en:以太网
wl:无线网
ww:广域网
4.名称类型
o<index>
:集成设备的设备索引号
s<slot>
:扩展槽的索引号
x<MAC>
:基于MAC地址的命名
p<bus>s<slot>:基于总线槽的拓扑结构进行命名
接口命名方式
2. 配置接口ip地址掩码的两种方式:
ifconfig INTERFACE IP/MASK [up|down]      #up和down为可选项
ifconfig INTERFACE IP netmask NETMASK [up|down]
举例:
![]()
[root@localhost ~]#
ifconfig eth1
192.168.
1.1/
24 up
[root@localhost ~
]#
[root@localhost ~]#
ifconfig
eth0 Link encap:Ethernet HWaddr 00:0C:
29:9F:AA:AD
inet addr:192.168.
172.136 Bcast:
192.168.
172.255 Mask:
255.255.
255.0
inet6 addr: fe80::20c:29ff:fe9f:aaad/
64 Scope:Link
UP BROADCAST RUNNING MULTICAST MTU:1500 Metric:
1
RX packets:2392 errors:
0 dropped:
0 overruns:
0 frame:
0
TX packets:510 errors:
0 dropped:
0 overruns:
0 carrier:
0
collisions:0 txqueuelen:
1000
RX bytes:168403 (
164.4 KiB) TX bytes:
43303 (
42.2 KiB)
eth1 Link encap:Ethernet HWaddr 00:0C:
29:9F:AA:B7
inet addr:192.168.
1.1 Bcast:
192.168.
1.255 Mask:
255.255.
255.0
inet6 addr: fe80::20c:29ff:fe9f:aab7/
64 Scope:Link
UP BROADCAST RUNNING MULTICAST MTU:1500 Metric:
1
RX packets:0 errors:
0 dropped:
0 overruns:
0 frame:
0
TX packets:5 errors:
0 dropped:
0 overruns:
0 carrier:
0
collisions:0 txqueuelen:
1000
RX bytes:0 (
0.0 b) TX bytes:
398 (
398.0 b)
lo Link encap:Local Loopback
inet addr:127.0.
0.1 Mask:
255.0.
0.0
inet6 addr: ::1/
128 Scope:Host
UP LOOPBACK RUNNING MTU:16436 Metric:
1
RX packets:0 errors:
0 dropped:
0 overruns:
0 frame:
0
TX packets:0 errors:
0 dropped:
0 overruns:
0 carrier:
0
collisions:0 txqueuelen:
0
RX bytes:0 (
0.0 b) TX bytes:
0 (
0.0 b)
View Code
3.开启接口的杂合模式,这里就不先做太多的说明,后面博客中会说明:
![]()
[root@localhost ~]#
ifconfig eth1 promisc
[root@localhost ~
]#
[root@localhost ~]#
ifconfig eth1
eth1 Link encap:Ethernet HWaddr 00:0C:
29:9F:AA:B7
inet addr:192.168.
1.1 Bcast:
192.168.
1.255 Mask:
255.255.
255.0
inet6 addr: fe80::20c:29ff:fe9f:aab7/
64 Scope:Link
UP BROADCAST RUNNING PROMISC MULTICAST MTU:1500 Metric:
1 #这里多了一个PROMISC
RX packets:29 errors:
0 dropped:
0 overruns:
0 frame:
0
TX packets:6 errors:
0 dropped:
0 overruns:
0 carrier:
0
collisions:0 txqueuelen:
1000
RX bytes:2985 (
2.9 KiB) TX bytes:
468 (
468.0 b)
View Code
4.新增和删除IPv6地址
ifconfig INTERFACE add addr/prefixlen
ifconfig INTERFACE del addr/prefixlen
举例:
![]()
[root@localhost ~]#
ifconfig eth1 add
2001:
0:
0:
12::
1/
64 #新增一个IPV6地址
[root@localhost ~
]#
[root@localhost ~]#
ifconfig eth1
eth1 Link encap:Ethernet HWaddr 00:0C:
29:9F:AA:B7
inet addr:192.168.
1.1 Bcast:
192.168.
1.255 Mask:
255.255.
255.0
inet6 addr: 2001:
0:
0:
12::
1/
64 Scope:Global
inet6 addr: fe80::20c:29ff:fe9f:aab7/
64 Scope:Link
UP BROADCAST RUNNING PROMISC MULTICAST MTU:1500 Metric:
1
RX packets:57 errors:
0 dropped:
0 overruns:
0 frame:
0
TX packets:10 errors:
0 dropped:
0 overruns:
0 carrier:
0
collisions:0 txqueuelen:
1000
RX bytes:6604 (
6.4 KiB) TX bytes:
836 (
836.0 b)
[root@localhost ~]#
ifconfig eth1 del
2001:
0:
0:
12::
1/
64 #删除ipv6地址
[root@localhost ~
]#
[root@localhost ~]#
ifconfig eth1
eth1 Link encap:Ethernet HWaddr 00:0C:
29:9F:AA:B7
inet addr:192.168.
1.1 Bcast:
192.168.
1.255 Mask:
255.255.
255.0
inet6 addr: fe80::20c:29ff:fe9f:aab7/
64 Scope:Link
UP BROADCAST RUNNING PROMISC MULTICAST MTU:1500 Metric:
1
RX packets:62 errors:
0 dropped:
0 overruns:
0 frame:
0
TX packets:12 errors:
0 dropped:
0 overruns:
0 carrier:
0
collisions:0 txqueuelen:
1000
RX bytes:7468 (
7.2 KiB) TX bytes:
1016 (
1016.0 b)
View Code
如果在没有配置ipv6地址的情况下,我们会发现每个接口都有一个开头为fe80的ipv6地址,这个地址被称为链路本地的地址,其前64为都是固定的格式,后64是位是基于EUI-64生成的,通俗的来说就是基于MAC地址生成的,链路本地地址只能用户本地的通信,如果想要实现上网的功能,就必须要给接口配置一个全局的地址,也就是全球可聚合单播地址,配置的方式就如上,显示为Global。
可以给接口起别名配置多个IP地址:
![]()
[root@localhost ~]#
ifconfig ens34:
1 192.168.
179.130 netmask
255.255.
255.0
[root@localhost ~
]#
[root@localhost ~]#
ifconfig
ens32: flags=
4163<UP,BROADCAST,RUNNING,MULTICAST> mtu
1500
inet 192.168.
172.134 netmask
255.255.
255.0 broadcast
192.168.
172.255
inet6 fe80::4:ed31:efad:25d0 prefixlen
64 scopeid
0x20<link>
ether 00:0c:
29:db:7f:
47 txqueuelen
1000 (Ethernet)
RX packets 25157 bytes
12826364 (
12.2 MiB)
RX errors 0 dropped
0 overruns
0 frame
0
TX packets 11651 bytes
2175604 (
2.0 MiB)
TX errors 0 dropped
0 overruns
0 carrier
0 collisions
0
ens34: flags=
4163<UP,BROADCAST,RUNNING,MULTICAST> mtu
1500
inet 192.168.
179.128 netmask
255.255.
255.0 broadcast
192.168.
179.255
ether 00:0c:
29:db:7f:
51 txqueuelen
1000 (Ethernet)
RX packets 666 bytes
91944 (
89.7 KiB)
RX errors 0 dropped
0 overruns
0 frame
0
TX packets 220 bytes
29356 (
28.6 KiB)
TX errors 0 dropped
0 overruns
0 carrier
0 collisions
0
ens34:1: flags=
4163<UP,BROADCAST,RUNNING,MULTICAST> mtu
1500
inet 192.168.
179.130 netmask
255.255.
255.0 broadcast
192.168.
179.255
ether 00:0c:
29:db:7f:
51 txqueuelen
1000 (Ethernet)
View Code
然后为别名添加配置文件即可,记得DEVICE为别名名称且BOOTPROTO:不支持动态获取地址。
注意:执行ifconfig的时候,命令执行后立即生效的,但是重启后失效!
二、route
1.查看路由条目
route -n #用数字表示,不加-n选项,可能会以主机名和其他的符号来显示地址
举例:
![]()
[root@localhost ~
]# route
Kernel IP routing table
Destination Gateway Genmask Flags Metric Ref Use Iface
192.168.
172.0 *
255.255.
255.0 U
0 0 0 eth0
link-local *
255.255.
0.0 U
1002 0 0 eth0
default 192.168.
172.2 0.0.
0.0 UG
0 0 0 eth0
[root@localhost ~
]#
[root@localhost ~]# route -
n
Kernel IP routing table
Destination Gateway Genmask Flags Metric Ref Use Iface
192.168.
172.0 0.0.
0.0 255.255.
255.0 U
0 0 0 eth0
169.254.
0.0 0.0.
0.0 255.255.
0.0 U
1002 0 0 eth0
0.0.
0.0 192.168.
172.2 0.0.
0.0 UG
0 0 0 eth0
View Code
2.添加路由条目
route add [-net|-host] target [netmask Nm] [gw GW] [[dev] If]
举例:
![]()
[root@localhost ~]# route add -net
100.100.
100.0/
24 gw
192.168.
1.1 #接口可省略
[root@localhost ~]# route -
n
Kernel IP routing table
Destination Gateway Genmask Flags Metric Ref Use Iface
100.100.
100.0 192.168.
1.1 255.255.
255.0 UG
0 0 0 eth1
192.168.
1.0 0.0.
0.0 255.255.
255.0 U
0 0 0 eth1
192.168.
172.0 0.0.
0.0 255.255.
255.0 U
0 0 0 eth0
169.254.
0.0 0.0.
0.0 255.255.
0.0 U
1002 0 0 eth0
0.0.
0.0 192.168.
172.2 0.0.
0.0 UG
0 0 0 eth0
[root@localhost ~]# route add default gw
192.168.
1.1 dev eth1 #使用default参数创建默认路由
[root@localhost ~]# route -
n
Kernel IP routing table
Destination Gateway Genmask Flags Metric Ref Use Iface
100.100.
100.0 192.168.
1.1 255.255.
255.0 UG
0 0 0 eth1
192.168.
1.0 0.0.
0.0 255.255.
255.0 U
0 0 0 eth1
192.168.
172.0 0.0.
0.0 255.255.
255.0 U
0 0 0 eth0
169.254.
0.0 0.0.
0.0 255.255.
0.0 U
1002 0 0 eth0
0.0.
0.0 192.168.
1.1 0.0.
0.0 UG
0 0 0 eth1
0.0.
0.0 192.168.
172.2 0.0.
0.0 UG
0 0 0 eth0
View Code
3.删除路由
route del [-net|-host] target [gw GW] [netmask Nm] [[dev] If]
举例:
![]()
[root@localhost ~]# route del -net
100.100.
100.0/
24
[root@localhost ~]# route del -net
0.0.
0.0/
0 gw
192.168.
1.1 #如果目的IP地址存在多个,可以指定网关地址,避免误删
[root@localhost ~]# route -
n
Kernel IP routing table
Destination Gateway Genmask Flags Metric Ref Use Iface
192.168.
1.0 0.0.
0.0 255.255.
255.0 U
0 0 0 eth1
192.168.
172.0 0.0.
0.0 255.255.
255.0 U
0 0 0 eth0
169.254.
0.0 0.0.
0.0 255.255.
0.0 U
1002 0 0 eth0
0.0.
0.0 192.168.
172.2 0.0.
0.0 UG
0 0 0 eth0
View Code
三、netstat命令
专门用来显示命令
1.显示路由表
netstat -rn
-r:显示内核路由表
-n:数字格式
举例:
![]()
[root@localhost ~]# netstat -
rn
Kernel IP routing table
Destination Gateway Genmask Flags MSS Window irtt Iface
192.168.
1.0 0.0.
0.0 255.255.
255.0 U
0 0 0 eth1
192.168.
172.0 0.0.
0.0 255.255.
255.0 U
0 0 0 eth0
169.254.
0.0 0.0.
0.0 255.255.
0.0 U
0 0 0 eth0
0.0.
0.0 192.168.
172.2 0.0.
0.0 UG
0 0 0 eth0
View Code
2.显示网络连接
netstat  [--tcp|-t]  [--udp|-u]  [--udplite|-U]  [--sctp|-S]  [--raw|-w]  [--listening|-l]  [--all|-a]  [--numeric|-n]   [--extend|-e[--extend|-e]]  [--program|-p]
-t:TCP的相关连接
-u:UDP相关连接
-w:raw socket相关连接
-l:处于监听状态的连接
-a:所有状态
-n:以数字格式显示ip和端口
-e:扩展格式
-p:显示相关进程及PID

常用组合:
-tan -uan -tnl -unl -tunlp
举例:
![]()
[root@localhost ~]# netstat -
tan
Active Internet connections (servers and established)
Proto Recv-Q Send-
Q Local Address Foreign Address State
tcp 0 0 0.0.
0.0:
22 0.0.
0.0:*
LISTEN
tcp 0 0 127.0.
0.1:
25 0.0.
0.0:*
LISTEN
tcp 0 64 192.168.
172.136:
22 192.168.
172.1:
60645 ESTABLISHED
tcp 0 0 :::
22 :::*
LISTEN
tcp 0 0 ::
1:
25 :::*
LISTEN
[root@localhost ~]# netstat -
uan
Active Internet connections (servers and established)
Proto Recv-Q Send-
Q Local Address Foreign Address State
udp 0 0 0.0.
0.0:
68 0.0.
0.0:*
[root@localhost ~]# netstat -
tnl
Active Internet connections (only servers)
Proto Recv-Q Send-
Q Local Address Foreign Address State
tcp 0 0 0.0.
0.0:
22 0.0.
0.0:*
LISTEN
tcp 0 0 127.0.
0.1:
25 0.0.
0.0:*
LISTEN
tcp 0 0 :::
22 :::*
LISTEN
tcp 0 0 ::
1:
25 :::*
LISTEN
[root@localhost ~]# netstat -
unl
Active Internet connections (only servers)
Proto Recv-Q Send-
Q Local Address Foreign Address State
udp 0 0 0.0.
0.0:
68 0.0.
0.0:*
[root@localhost ~]# netstat -
tunlp
Active Internet connections (only servers)
Proto Recv-Q Send-Q Local Address Foreign Address State PID/
Program name
tcp 0 0 0.0.
0.0:
22 0.0.
0.0:* LISTEN
1008/
sshd
tcp 0 0 127.0.
0.1:
25 0.0.
0.0:* LISTEN
1084/
master
tcp 0 0 :::
22 :::* LISTEN
1008/
sshd
tcp 0 0 ::
1:
25 :::* LISTEN
1084/
master
udp 0 0 0.0.
0.0:
68 0.0.
0.0:*
904/dhclient
View Code
3.显示接口的统计数据
netstat    {--interfaces|-I|-i}    [iface]   [--all|-a]   [--extend|-e]   [--verbose|-v]   [--program|-p]  [--numeric|-n]
所有接口的信息:netstat -i
指定的接口:netstat -I<INTERFACE>
举例:
![]()
[root@localhost ~]# netstat -
i
Kernel Interface table
Iface MTU Met RX-OK RX-ERR RX-DRP RX-OVR TX-OK TX-ERR TX-DRP TX-
OVR Flg
eth0 1500 0 2288 0 0 0 1099 0 0 0 BMRU
eth1 1500 0 8 0 0 0 6 0 0 0 BMRU
lo 16436 0 0 0 0 0 0 0 0 0 LRU
[root@localhost ~]# netstat -
Ieth1
Kernel Interface table
Iface MTU Met RX-OK RX-ERR RX-DRP RX-OVR TX-OK TX-ERR TX-DRP TX-
OVR Flg
eth1 1500 0 8 0 0 0 6 0 0 0 BMRU
View Code
四、ifup和ifdown
开启或者关闭接口,通过配置文件来识别接口并完成配置,如果接口没有配置文件,则不能生效。
ifup INTERFACE
ifdown  INTERFACE
五、ip
ip的功能很强大,这里只做一些常用的用法的介绍,具体可以见man手册。
NAME:show / manipulate routing, devices, policy routing and tunnels
ip [ OPTIONS ] OBJECT { COMMAND | help }
    OBJECT := { link | addr | route | netns  } #注意,在写命令的时候,OBJECT可以简写,各个OBJECT的子命令也可以简写
1. ip link:网络设备管理
ip link set:修改设备的属性
dev NAME:默认参数,指明要管理的设备,关键字dev可以省略;
         {up|down}:开启或关闭设备
         {multicast on|multicast off}:开启或关闭多播功能
         {name NAME}:重命名接口,必须先将设备关闭
         netns PID|netnsname:netns为名称空间,将接口移动到指定的网络名称空间
ip link show:查看设备的状态
ip link help:显示帮助信息
举例:
![]()
[root@localhost ~
]# ip link set ens34 down #关闭ens34
[root@localhost ~
]# ip link set ens34 name eth34 #重命名
[root@localhost ~
]#
[root@localhost ~]#
ifconfig -
a
ens32: flags=
4163<UP,BROADCAST,RUNNING,MULTICAST> mtu
1500
inet 192.168.
172.134 netmask
255.255.
255.0 broadcast
192.168.
172.255
inet6 fe80::4:ed31:efad:25d0 prefixlen
64 scopeid
0x20<link>
ether 00:0c:
29:db:7f:
47 txqueuelen
1000 (Ethernet)
RX packets 14177 bytes
10140644 (
9.6 MiB)
RX errors 0 dropped
0 overruns
0 frame
0
TX packets 5848 bytes
1208376 (
1.1 MiB)
TX errors 0 dropped
0 overruns
0 carrier
0 collisions
0
eth34: flags=
4098<BROADCAST,MULTICAST> mtu
1500
ether 00:0c:
29:db:7f:
51 txqueuelen
1000 (Ethernet)
RX packets 399 bytes
55093 (
53.8 KiB)
RX errors 0 dropped
0 overruns
0 frame
0
TX packets 102 bytes
15624 (
15.2 KiB)
TX errors 0 dropped
0 overruns
0 carrier
0 collisions
0
[root@localhost ~
]# ip link set eth34 name ens34
[root@localhost ~
]# ip link set ens34 up
[root@localhost ~]#
ifconfig
ens32: flags=
4163<UP,BROADCAST,RUNNING,MULTICAST> mtu
1500
inet 192.168.
172.134 netmask
255.255.
255.0 broadcast
192.168.
172.255
inet6 fe80::4:ed31:efad:25d0 prefixlen
64 scopeid
0x20<link>
ether 00:0c:
29:db:7f:
47 txqueuelen
1000 (Ethernet)
RX packets 14382 bytes
10157346 (
9.6 MiB)
RX errors 0 dropped
0 overruns
0 frame
0
TX packets 5954 bytes
1220936 (
1.1 MiB)
TX errors 0 dropped
0 overruns
0 carrier
0 collisions
0
ens34: flags=
4163<UP,BROADCAST,RUNNING,MULTICAST> mtu
1500
inet 192.168.
179.128 netmask
255.255.
255.0 broadcast
192.168.
179.255
inet6 fe80::3062:d2dc:
471:
6045 prefixlen
64 scopeid
0x20<link>
ether 00:0c:
29:db:7f:
51 txqueuelen
1000 (Ethernet)
RX packets 403 bytes
55727 (
54.4 KiB)
RX errors 0 dropped
0 overruns
0 frame
0
TX packets 112 bytes
16702 (
16.3 KiB)
TX errors 0 dropped
0 overruns
0 carrier
0 collisions
0
View Code
2.ip netns:管理网络名称空间(manage network namespaces)
ip netns list:列出所有的网络名称空间
ip netns add NAME:创建指定的网络名称空间
ip netns del NAME:删除指定的网络名称空间
ip netns exec NAME COMMAND:在指定的netns中运行命令
举例:
![]()
[root@localhost ~
]# ip netns add mynetns #创建了一个名称空间
[root@localhost ~
]#
[root@localhost ~
]# ip netns list #查看名称空间
mynetns
[root@localhost ~
]# ip link set ens34 netns mynetns #将ens34绑定到名称空间mynetns
[root@localhost ~]#
ifconfig -
a #这时候我们会发现设备没有了
ens32: flags=
4163<UP,BROADCAST,RUNNING,MULTICAST> mtu
1500
inet 192.168.
172.134 netmask
255.255.
255.0 broadcast
192.168.
172.255
inet6 fe80::4:ed31:efad:25d0 prefixlen
64 scopeid
0x20<link>
ether 00:0c:
29:db:7f:
47 txqueuelen
1000 (Ethernet)
RX packets 14892 bytes
10199499 (
9.7 MiB)
RX errors 0 dropped
0 overruns
0 frame
0
TX packets 6234 bytes
1258060 (
1.1 MiB)
TX errors 0 dropped
0 overruns
0 carrier
0 collisions
0
lo: flags=
73<UP,LOOPBACK,RUNNING> mtu
65536
inet 127.0.
0.1 netmask
255.0.
0.0
inet6 ::1 prefixlen
128 scopeid
0x10<host>
loop txqueuelen 1 (Local Loopback)
RX packets 72 bytes
6260 (
6.1 KiB)
RX errors 0 dropped
0 overruns
0 frame
0
TX packets 72 bytes
6260 (
6.1 KiB)
TX errors 0 dropped
0 overruns
0 carrier
0 collisions
0
[root@localhost ~
]# ip link show
1: lo: <LOOPBACK,UP,LOWER_UP> mtu
65536 qdisc noqueue state UNKNOWN mode DEFAULT qlen
1
link/loopback
00:
00:
00:
00:
00:
00 brd
00:
00:
00:
00:
00:
00
2: ens32: <BROADCAST,MULTICAST,UP,LOWER_UP> mtu
1500 qdisc pfifo_fast state UP mode DEFAULT qlen
1000
link/ether
00:0c:
29:db:7f:
47 brd ff:ff:ff:ff:ff:ff
[root@localhost ~
]# ip netns exec mynetns ip link show #只有在名称空间内执行命令才能看到,使用ifconfig无效
1: lo: <LOOPBACK> mtu
65536 qdisc noop state DOWN mode DEFAULT qlen
1
link/loopback
00:
00:
00:
00:
00:
00 brd
00:
00:
00:
00:
00:
00
3: ens34: <BROADCAST,MULTICAST> mtu
1500 qdisc noop state DOWN mode DEFAULT qlen
1000
link/ether
00:0c:
29:db:7f:
51 brd ff:ff:ff:ff:ff:ff
[root@localhost ~
]# ip netns exec mynetns ip link set ens34 up #启用接口
[root@localhost ~
]# ip netns exec mynetns ip link show
1: lo: <LOOPBACK> mtu
65536 qdisc noop state DOWN mode DEFAULT qlen
1
link/loopback
00:
00:
00:
00:
00:
00 brd
00:
00:
00:
00:
00:
00
3: ens34: <BROADCAST,MULTICAST,UP,LOWER_UP> mtu
1500 qdisc pfifo_fast state UP mode DEFAULT qlen
1000
link/ether
00:0c:
29:db:7f:
51 brd ff:ff:ff:ff:ff:ff
View Code
3.ip address:协议地址管理(protocol address management)
ip address IFADDR dev INTERFACE:新增地址,一个接口可以有多个地址
ip address delete IFADDR dev INTERFACE:删除接口的地址
ip address show [INTERFACE]:显示接口地址
ip address flush dev INTERFACE:删除接口地址
举例:
![]()
[root@localhost ~
]# ip address flush ens34
[root@localhost ~]#
ifconfig
ens32: flags=
4163<UP,BROADCAST,RUNNING,MULTICAST> mtu
1500
inet 192.168.
172.134 netmask
255.255.
255.0 broadcast
192.168.
172.255
inet6 fe80::4:ed31:efad:25d0 prefixlen
64 scopeid
0x20<link>
ether 00:0c:
29:db:7f:
47 txqueuelen
1000 (Ethernet)
RX packets 15955 bytes
10285157 (
9.8 MiB)
RX errors 0 dropped
0 overruns
0 frame
0
TX packets 6762 bytes
1356066 (
1.2 MiB)
TX errors 0 dropped
0 overruns
0 carrier
0 collisions
0
ens34: flags=
4163<UP,BROADCAST,RUNNING,MULTICAST> mtu
1500
ether 00:0c:
29:db:7f:
51 txqueuelen
1000 (Ethernet)
RX packets 413 bytes
57483 (
56.1 KiB)
RX errors 0 dropped
0 overruns
0 frame
0
TX packets 138 bytes
18976 (
18.5 KiB)
TX errors 0 dropped
0 overruns
0 carrier
0 collisions
0
[root@localhost ~]# ip address add
192.168.
179.22/
24 dev ens34
[root@localhost ~
]#
[root@localhost ~]#
ifconfig ens34
ens34: flags=
4163<UP,BROADCAST,RUNNING,MULTICAST> mtu
1500
inet 192.168.
179.22 netmask
255.255.
255.0 broadcast
0.0.
0.0
ether 00:0c:
29:db:7f:
51 txqueuelen
1000 (Ethernet)
RX packets 416 bytes
57775 (
56.4 KiB)
RX errors 0 dropped
0 overruns
0 frame
0
TX packets 141 bytes
19212 (
18.7 KiB)
TX errors 0 dropped
0 overruns
0 carrier
0 collisions
0
[root@localhost ~]# ip address delete
192.168.
179.22/
24 dev ens34
[root@localhost ~]#
ifconfig ens34
ens34: flags=
4163<UP,BROADCAST,RUNNING,MULTICAST> mtu
1500
ether 00:0c:
29:db:7f:
51 txqueuelen
1000 (Ethernet)
RX packets 424 bytes
58479 (
57.1 KiB)
RX errors 0 dropped
0 overruns
0 frame
0
TX packets 149 bytes
19804 (
19.3 KiB)
TX errors 0 dropped
0 overruns
0 carrier
0 collisions
0
[root@localhost ~
]# ip address show
1: lo: <LOOPBACK,UP,LOWER_UP> mtu
65536 qdisc noqueue state UNKNOWN qlen
1
link/loopback
00:
00:
00:
00:
00:
00 brd
00:
00:
00:
00:
00:
00
inet 127.0.
0.1/
8 scope host lo
valid_lft forever preferred_lft forever
inet6 ::1/
128 scope host
valid_lft forever preferred_lft forever
2: ens32: <BROADCAST,MULTICAST,UP,LOWER_UP> mtu
1500 qdisc pfifo_fast state UP qlen
1000
link/ether
00:0c:
29:db:7f:
47 brd ff:ff:ff:ff:ff:ff
inet 192.168.
172.134/
24 brd
192.168.
172.255 scope global dynamic ens32
valid_lft 1180sec preferred_lft 1180sec
inet6 fe80::4:ed31:efad:25d0/
64 scope link
valid_lft forever preferred_lft forever
3: ens34: <BROADCAST,MULTICAST,UP,LOWER_UP> mtu
1500 qdisc pfifo_fast state UP qlen
1000
link/ether
00:0c:
29:db:7f:
51 brd ff:ff:ff:ff:ff:ff
View Code
4.ip route:路由表管理(routing table management)
ip route add  TYPE PREFIX  via GW  [dev  IFACE]  [src SOURCE_IP]:新增一条路由
ip route delete TYPE PREFIX:删除路由
ip route show [TYPE PRIFIX]:查看路由
ip route flush:清空路由
ip route get TYPE PREFIX:获得一个单独的路由信息
详见帮助信息:man  ip route
举例:
![]()
[root@localhost ~
]# ip route show
default via 192.168.
172.2 dev ens32 proto static metric
100
192.168.
172.0/
24 dev ens32 proto kernel scope link src
192.168.
172.134 metric
100
192.168.
179.0/
24 dev ens34 proto kernel scope link src
192.168.
179.128
192.168.
179.0/
24 dev ens34 proto kernel scope link src
192.168.
179.128 metric
100
[root@localhost ~
]#
[root@localhost ~]# ip route add
100.100.
100.0/
24 via
192.168.
179.128 dev ens34
[root@localhost ~
]#
[root@localhost ~
]# ip route show
default via 192.168.
172.2 dev ens32 proto static metric
100
100.100.
100.0/
24 via
192.168.
179.128 dev ens34
192.168.
172.0/
24 dev ens32 proto kernel scope link src
192.168.
172.134 metric
100
192.168.
179.0/
24 dev ens34 proto kernel scope link src
192.168.
179.128
192.168.
179.0/
24 dev ens34 proto kernel scope link src
192.168.
179.128 metric
100
[root@localhost ~]# ip route show
100.100.
100.0/
24
100.100.
100.0/
24 via
192.168.
179.128 dev ens34
[root@localhost ~]# ip route get
100.100.
100.0/
24
100.100.
100.0 dev ens34 src
192.168.
179.128
cache
View Code
六、ss命令
ss和netstat的功能类似,但是比netstat的功能强大。
net [options] [FILTER]
options:
-t:TCP的相关连接
-u:UDP的相关连接
-w:raw socket的相关连接
-l:监听状态的连接
-a:所有状态的连接
-n:数字格式显示
-p:相关的程序及其PID
-e:扩展格式信息
-m:内存用量
-o:计时器信息
FILTER:
[ state TCP-STATE ]  [ EXPRESSION ]
TCP-STATE:
LISTEN:监听
ESTABLISEHD:已经建立连接
FIN_WAIT_1:
FIN_WAIT_2:
SYN_SENT:
SYN_RECV:
CLOSED:
EXPRESSION:
dport:目的端口
sport:源端口
...
举例:
![]()
[root@localhost ~]# ss -
tan
State Recv-Q Send-
Q Local Address:Port Peer Address:Port
LISTEN 0 128 *:
22 *:*
LISTEN 0 100 127.0.
0.1:
25 *:*
ESTAB 0 0 192.168.
172.134:
22 192.168.
172.1:
57461
LISTEN 0 128 :::
22 :::*
LISTEN 0 100 ::
1:
25 :::*
[root@localhost ~]# ss -
tanp
State Recv-Q Send-
Q Local Address:Port Peer Address:Port
LISTEN 0 128 *:
22 *:* users:((
"sshd",pid=
943,fd=
3))
LISTEN 0 100 127.0.
0.1:
25 *:* users:((
"master",pid=
1038,fd=
13))
ESTAB 0 180 192.168.
172.134:
22 192.168.
172.1:
57461 users:((
"sshd",pid=
1074,fd=
3))
LISTEN 0 128 :::
22 :::* users:((
"sshd",pid=
943,fd=
4))
LISTEN 0 100 ::
1:
25 :::* users:((
"master",pid=
1038,fd=
14))
[root@localhost ~]# ss -
uan
State Recv-Q Send-
Q Local Address:Port Peer Address:Port
ESTAB 0 0 192.168.
172.134:
60204 61.216.
153.106:
123
UNCONN 0 0 127.0.
0.1:
323 *:*
UNCONN 0 0 *:
1524 *:*
UNCONN 0 0 *:
68 *:*
UNCONN 0 0 *:
68 *:*
UNCONN 0 0 *:
30403 *:*
UNCONN 0 0 :::
27349 :::*
UNCONN 0 0 ::
1:
323 :::*
UNCONN 0 0 :::
5011 :::*
[root@localhost ~]# ss -tan
'( dport = :22 or sport = :22 )'
State Recv-Q Send-
Q Local Address:Port Peer Address:Port
LISTEN 0 128 *:
22 *:*
ESTAB 0 52 192.168.
172.134:
22 192.168.
172.1:
57461
LISTEN 0 128 :::
22 :::*
[root@localhost ~
]#
[root@localhost ~]# ss -
tan state ESTABLISHED
Recv-Q Send-
Q Local Address:Port Peer Address:Port
0 52 192.168.
172.134:
22 192.168.
172.1:
57461
View Code
七、配置主机名
hostname
hostname:查看主机名
hostname HOSTNAME:修改主机名,重启后无效
在centos7中:
hostnamectl status:显示当前主机名等信息
hostnamectl  set-hostname HOSTNAME:设置主机名,永久有效
网络属性配置文件
一、主机名的配置文件
/etc/sysconfig/network (在centos7有这个文件,但是为空,因为在centos7中新增了hostnamectl set-hostname,可以设置永久有效的主机名了):
centos6:
[root@localhost ~]# vim /etc/sysconfig/network

NETWORKING=yes
HOSTNAME=localhost.localdomain
注意:修改配置文件不会立即生效,但是以后会一直有效。
二、DNS的配置文件
/etc/hosts:负责ip地址与域名快速解析的文件,hosts文件包含了IP地址和主机名之间的映射,在域名解析的过程中,会先查看hosts文件中是否有域名和ip地址之间的映射关系,如果没有则向DNS服务器发起域名解析的请求:
[root@frankhost ~]# vim /etc/hosts

127.0.0.1   localhost localhost.localdomain localhost4 localhost4.localdomain4
::1         localhost localhost.localdomain localhost6 localhost6.localdomain6
/etc/resolv.conf:配置的是DNS服务器的地址,当主机要访问某个域名的时候,就会向resolv.conf的中的DNS服务器发起解析的请求:
[root@localhost ~]# vim /etc/resolv.conf

# Generated by NetworkManager
search localdomain
nameserver 192.168.172.2
nameserver 192.168.179.1
三、接口和路由的配置文件
/etc/sysconfig/network-scripts/ifcfg-IFACE:通过大量的参数来定义接口的属性,可以通过vim等文本编辑器直接修改:
[root@localhost ~]# vim /etc/sysconfig/network-scripts/ifcfg-ens32

TYPE=Ethernet    #接口类型
BOOTPROTO=dhcp   #激活此接口使用什么协议来配置接口的属性,有dhcp、bootp、static、none等
DEFROUTE=yes     #是否以此接口创建默认路由
PEERDNS=yes      #如果BOOTPROTO的值为DHCP,是否允许dhcp server分配的dns服务器指向覆盖本地手动指定的DNS服务器指向
PEERROUTES=yes
IPV4_FAILURE_FATAL=no
IPV6INIT=yes    #是否初始化IPV6
IPV6_AUTOCONF=yes
IPV6_DEFROUTE=yes
IPV6_PEERDNS=yes
IPV6_PEERROUTES=yes
IPV6_FAILURE_FATAL=no
IPV6_ADDR_GEN_MODE=stable-privacy
NAME=ens32   #此配置文件对于的设备名称
UUID=a3471195-913d-4e38-b521-47ffa1859ffe  #此设备的唯一标识
DEVICE=ens32  #此设备文件对于的设备名称
ONBOOT=yes
除了以上的一些参数之外还有其他一些比较重要的参数:
DNS1:DNS指向,最多可以有三个
DOMAIN:DNS搜索域
IPADDR:ip地址
NETMASK:子网掩码;在centos7中支持使用PREFIX以长度方式指明子网掩码
GATEWAY:默认网关
USERCTL:是否允许普通用户控制
HWADDR:设备的MAC地址
NM_CONTROLLED:是否使用NetworkManager服务来控制接口
/etc/sysconfig/network-scripts/route-IFACE:针对每个接口都有其对应的路由配置文件,有两种配置方式,但是不可以混用:
(1)每行配置一条路由:
target/prefix via GW
(2)每三行配置一条路由:
ADDRESS#=target
NETWORK#=mask
GATEWAY#=NEXTHOP
#为数字0.1.2.3....
举例:
![]()
[root@frankhost ~]# vim /etc/sysconfig/network-scripts/route-
eth0
100.100.
100.0/
24 via
192.168.
172.136
[root@frankhost ~]# route -
n
Kernel IP routing table
Destination Gateway Genmask Flags Metric Ref Use Iface
100.100.
100.0 192.168.
172.136 255.255.
255.0 UG
0 0 0 eth0
192.168.
172.0 0.0.
0.0 255.255.
255.0 U
0 0 0 eth0
169.254.
0.0 0.0.
0.0 255.255.
0.0 U
1002 0 0 eth0
0.0.
0.0 192.168.
172.2 0.0.
0.0 UG
0 0 0
[root@frankhost ~]# vim /etc/sysconfig/network-scripts/route-
eth0
ADDRESS0=
192.168.
1.0
NETMASK0=
255.255.
255.0
GATEWAY0=
192.168.
172.136
[root@frankhost ~]# route -
n
Kernel IP routing table
Destination Gateway Genmask Flags Metric Ref Use Iface
192.168.
1.0 192.168.
172.136 255.255.
255.0 UG
0 0 0 eth0
192.168.
172.0 0.0.
0.0 255.255.
255.0 U
0 0 0 eth0
169.254.
0.0 0.0.
0.0 255.255.
0.0 U
1002 0 0 eth0
0.0.
0.0 192.168.
172.2 0.0.
0.0 UG
0 0 0 eth0
View Code
图像化的方式配置网络属性
在centos6中:
执行system-config-network或者setup命令:
安装:yum -y install system-config-network-tui
安装:yum -y install setuptool
setup界面:

在centos7中:
执行nmtui命令
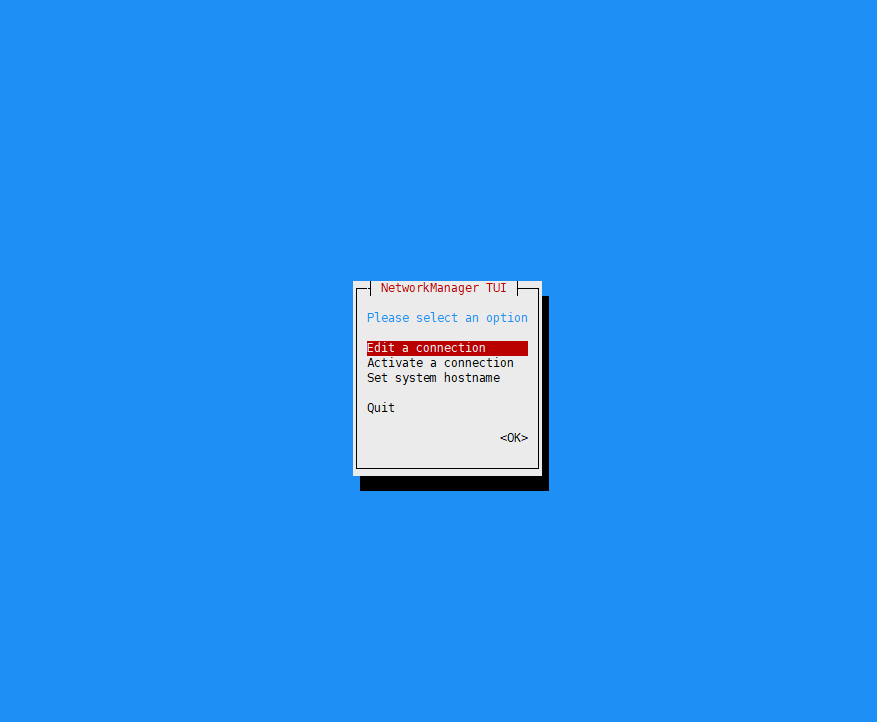
该怎么用就不多说了,毕竟是傻瓜式的配置,永久有效。
在centos7中有一个很强大也很复杂的网络配置管理命令:nmcli,这里暂时就不做介绍了,以后有机会单独写一篇博客,nmcli参考链接:https://linux.cn/article-6241-1.html,或者请看man手册。
评论暂时关闭