使用PyQt5和Qt Designer创建Python GUI应用程序(四)
使用PyQt5和Qt Designer创建Python GUI应用程序(四)
这篇PyQt5教程将向您展示如何使用称为QPixmap控件来显示图像。
显示一个图像
在本教程中,我们将使用PyQt Designer创建一个图像,然后从Python代码中将它们更改为图像源。
要显示图像,我们实际上可以使用标签!
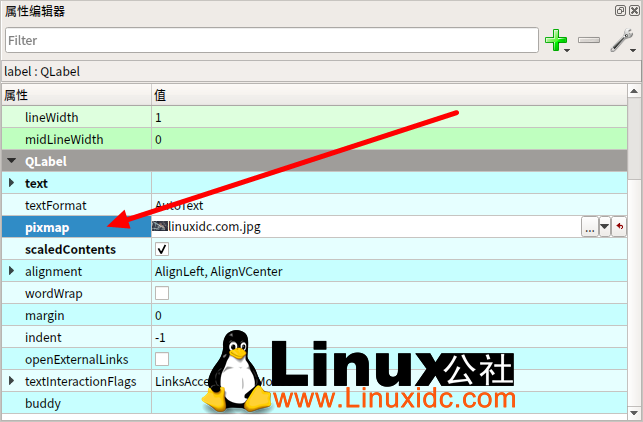
我们将从拖动一个标签开始,并将其调整到我们想要的尺寸。在这之后,我们将向下滚动属性编辑器标签,直到我们看到一个Pixmap。这里我们可以选择要显示的图像文件。
单击黑色箭头后,我们可以选择一个文件。
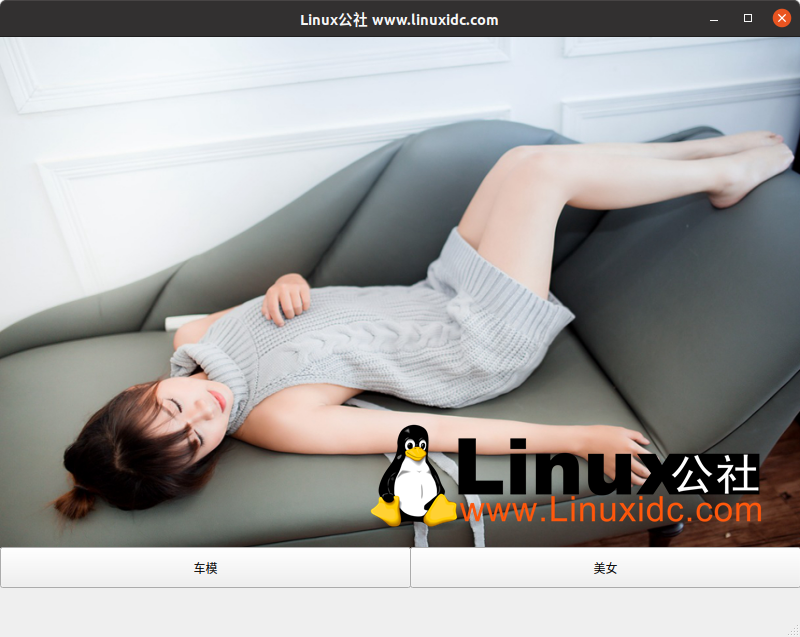
改变图像
对于这个特定的程序,我想创建两个按钮,我们可以用来改变图像。我通过添加两个按钮来设置UI来支持这一点。
创建UI之后,保存它,并使用以下命令将其转换为python文件:
[linuxidc@linux:~/www.linuxboy.net]$ pyuic5 linuxidc.ui –o linuxidc.py
接下来,我们将打开python文件并添加一些方法来更改图像源。
要编辑我们的图像源,我们将使用以下行。
self.photo.setPixmap(GtGUI.QPixmap("linuxidc.jpg"))
# 注意:photo是我的标签名
# "linuxidc.jpg"是和我的python文件在同一个目录中的一张照片
我们将添加一些可以调用来更改图像的方法。
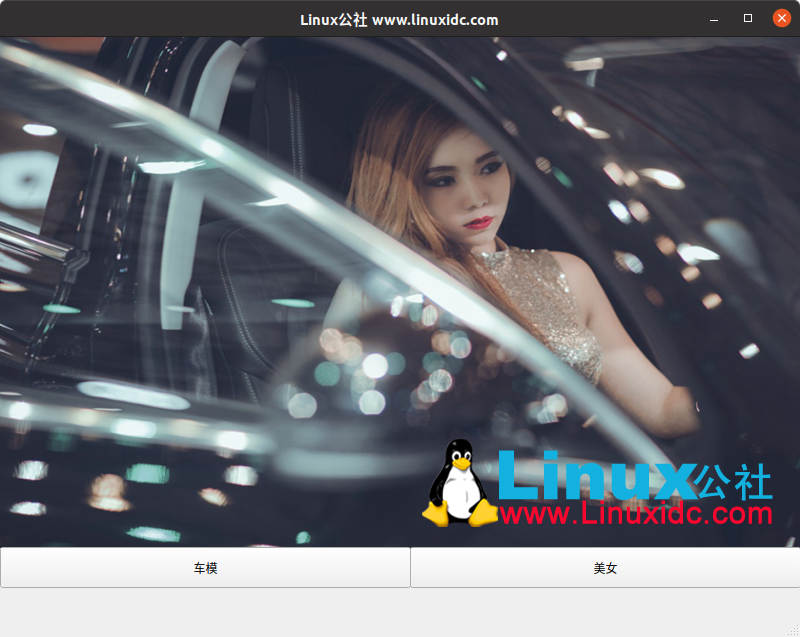
    def show_chemo(self):
         self.photo.setPixmap(QtGUI.QPixmap("linuxboy.net.jpg"))

    def  show_meinv(self):
        self.photo.setPixmap(QtGUI.Qpixmap("linuxidc.jpg"))
最后链接我们的按钮来调用它们。
    def setupUI(self):
        ...
         self.meinv.clicked.connect(self.show_meinv)
         self.chemo.clicked.connect(self.show_chemo)
完整代码
# -*- coding: utf-8 -*-

# Form implementation generated from reading ui file 'test.ui'
#
# Created by: PyQt5 UI code generator 5.11.3
#
# WARNING! All changes made in this file will be lost!

from PyQt5 import QtCore, QtGui, QtWidgets

class Ui_MainWindow(object):
    def setupUi(self, MainWindow):
        MainWindow.setObjectName("MainWindow")
        MainWindow.resize(800, 600)
        self.centralwidget = QtWidgets.QWidget(MainWindow)
        self.centralwidget.setObjectName("centralwidget")
        self.photo = QtWidgets.QLabel(self.centralwidget)
        self.photo.setGeometry(QtCore.QRect(0, 0, 841, 511))
        self.photo.setText("")
        self.photo.setPixmap(QtGui.QPixmap("linuxboy.net.jpg"))
        self.photo.setScaledContents(True)
        self.photo.setObjectName("photo")
        self.meinv = QtWidgets.QPushButton(self.centralwidget)
        self.meinv.setGeometry(QtCore.QRect(0, 510, 411, 41))
        self.meinv.setObjectName("meinv")
        self.chemo = QtWidgets.QPushButton(self.centralwidget)
        self.chemo.setGeometry(QtCore.QRect(410, 510, 391, 41))
        self.chemo.setObjectName("chemo")
        MainWindow.setCentralWidget(self.centralwidget)
        self.menubar = QtWidgets.QMenuBar(MainWindow)
        self.menubar.setGeometry(QtCore.QRect(0, 0, 800, 21))
        self.menubar.setObjectName("menubar")
        MainWindow.setMenuBar(self.menubar)
        self.statusbar = QtWidgets.QStatusBar(MainWindow)
        self.statusbar.setObjectName("statusbar")
        MainWindow.setStatusBar(self.statusbar)

        self.retranslateUi(MainWindow)
        QtCore.QMetaObject.connectSlotsByName(MainWindow)

        self.chemo.clicked.connect(self.show_chemo)
        self.meinv.clicked.connect(self.show_meinv)

    def retranslateUi(self, MainWindow):
        _translate = QtCore.QCoreApplication.translate
        MainWindow.setWindowTitle(_translate("MainWindow", "linuxboy www.linuxboy.net"))
        self.meinv.setText(_translate("MainWindow", "车模"))
        self.chemo.setText(_translate("MainWindow", "美女"))

    def show_chemo(self):
        self.photo.setPixmap(QtGui.QPixmap("linuxidc.jpg"))

    def show_meinv(self):
        self.photo.setPixmap(QtGui.QPixmap("linuxboy.net.jpg"))

if __name__ == "__main__":
    import sys
    app = QtWidgets.QApplication(sys.argv)
    MainWindow = QtWidgets.QMainWindow()
    ui = Ui_MainWindow()
    ui.setupUi(MainWindow)
    MainWindow.show()
    sys.exit(app.exec_())
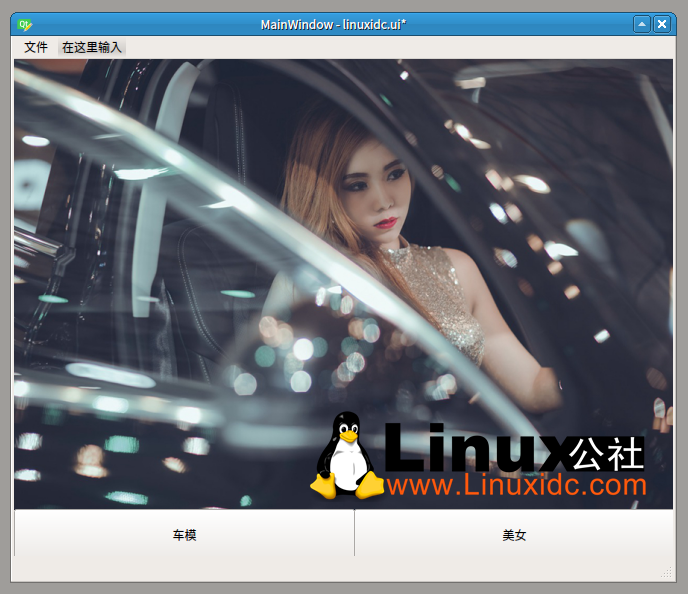
效果如下:

在下一个教程中,我们将讨论如何使用pyqt创建消息框/弹出窗口
使用PyQt5和Qt Designer创建Python GUI应用程序 见 https://www.linuxboy.net/search.aspx?where=nkey&keyword=65658
https://www.linuxboy.net/topicnews.aspx?tid=17
linuxboy的RSS地址:https://www.linuxboy.net/rssFeed.aspx
本文永久更新链接地址:https://www.linuxboy.net/Linux/2020-05/163153.htm

评论暂时关闭