Centos8中恢复根目录为默认权限,
Centos8中恢复根目录为默认权限,

本文中介绍如何从意外运行# chmod -R 777 /命令,在Centos8操作系统上恢复默认权限。
本文中我们将故意在一个测试服务器上运行chmod 777命令,并尝试通过运行两个命令进行恢复。就是如下两条命令:
- # rpm --setugids -a
- # rpm --setperms -a
当再测试机上面执行下面命令之后,所有文件权限都会变成777。
- [root@localhost ~]# chmod -R 777 /
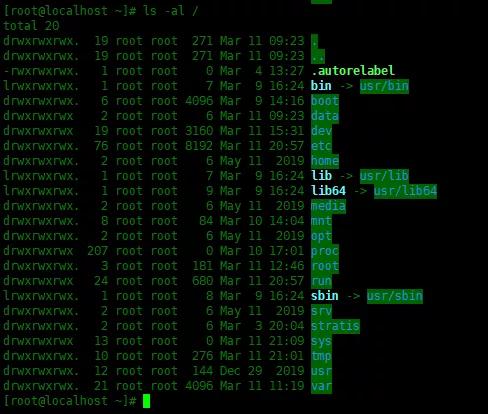
列出根目录下面的内容:
- [root@localhost ~]# ls -al /
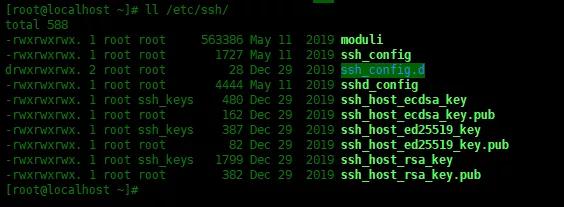
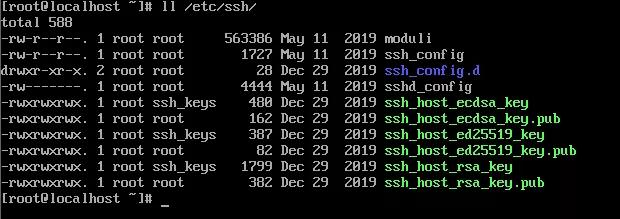
下面是SSH相关的重要文件,需要有正确的权限和所有权。但是,由于运行chmod 777,以下所有文件都具有错误的权限。
- [root@localhost ~]# ll /etc/ssh/
- total 588
- -rwxrwxrwx. 1 root root 563386 May 11 2019 moduli
- -rwxrwxrwx. 1 root root 1727 May 11 2019 ssh_config
- drwxrwxrwx. 2 root root 28 Dec 29 2019 ssh_config.d
- -rwxrwxrwx. 1 root root 4444 May 11 2019 sshd_config
- -rwxrwxrwx. 1 root ssh_keys 480 Dec 29 2019 ssh_host_ecdsa_key
- -rwxrwxrwx. 1 root root 162 Dec 29 2019 ssh_host_ecdsa_key.pub
- -rwxrwxrwx. 1 root ssh_keys 387 Dec 29 2019 ssh_host_ed25519_key
- -rwxrwxrwx. 1 root root 82 Dec 29 2019 ssh_host_ed25519_key.pub
- -rwxrwxrwx. 1 root ssh_keys 1799 Dec 29 2019 ssh_host_rsa_key
- -rwxrwxrwx. 1 root root 382 Dec 29 2019 ssh_host_rsa_key.pub
带有chmod 777权限的SSH
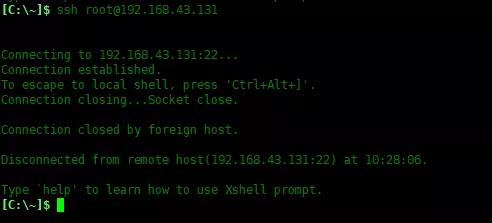
下面尝试通过SSH远程登录服务器。由于主机密钥文件权限都变成了777了,所以登录会被拒绝。
下面再终端中ssh登录本机出现下面问题:

下面使用Xshell登录服务器,同样不能登录成功:
- [C:\~]$ ssh root@192.168.43.131
- Connecting to 192.168.43.131:22...
- Connection established.
- To escape to local shell, press 'Ctrl+Alt+]'.
- Connection closing...Socket close.
- Connection closed by foreign host.
- Disconnected from remote host(192.168.43.131:22) at 10:28:06.
- Type `help' to learn how to use Xshell prompt.
恢复权限
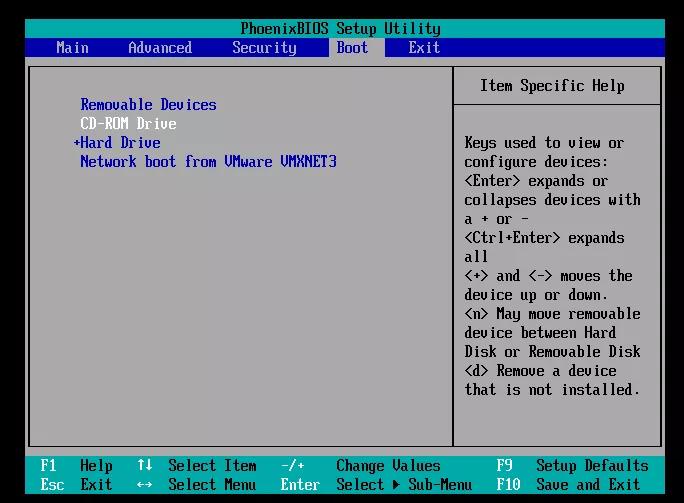
需要恢复权限,我们需要加载Centos8的系统镜像,开机启动光盘镜像:
在VMware Workstation中,加载光盘,并开机器用。开机按F2,进入BIOS,切换到Boot选项卡。将CD-ROM Drive移动到Hard Drive上面。按F10保存并重启。
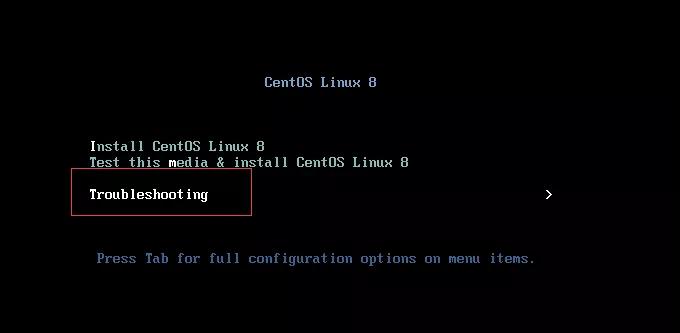
选择Troubleshooting,然后选择进入救援模式。


当进入下面界面时,选择1,直接进入shell界面。
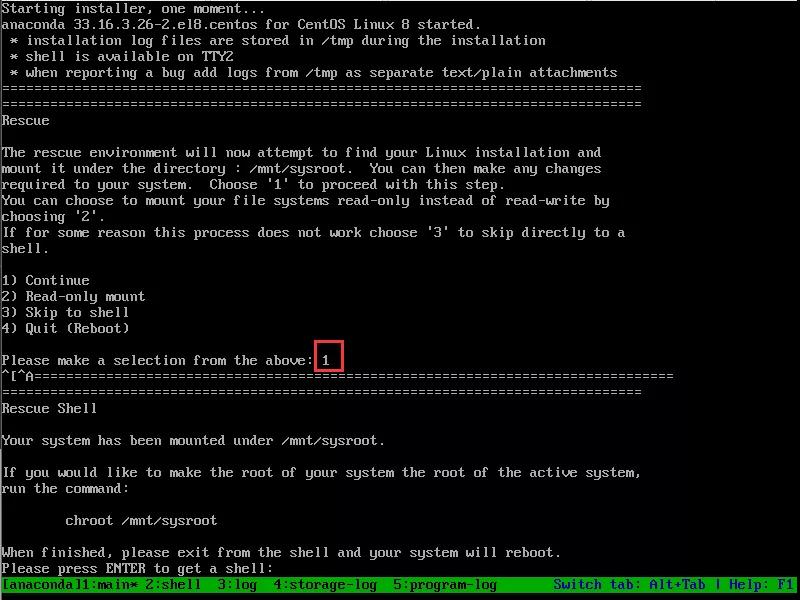
使用chroot命令将/mnt/sysroot切换为根目录:
- sh-4.4# chroot /mnt/sysroot

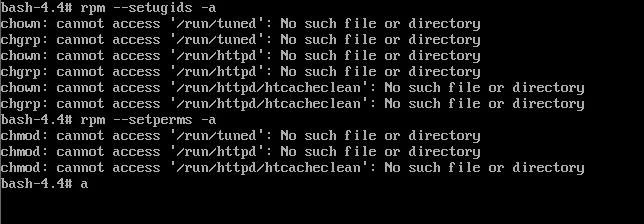
使用以下两个命令运行,以恢复所有文件,目录和配置的权限。运行此命令时,它将引发权限被拒绝错误,并且无法访问错误。只是忽略错误。
- # rpm --setugids -a
- # rpm --setperms -a
参数说明:
--setugids - 设置RPM包文件的用户/组所有权。
--setperms - 设置RPM包文件的权限。
-a - 适用于所有已安装的RPM软件包。
完成操作之后,退出,并重启:
- # exit
- # reboot
查看权限、SSH连接服务器测试
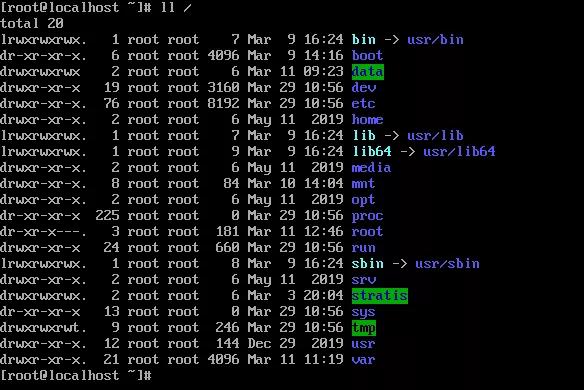
下面登录系统之后,看一下根目录的权限是否恢复正常:
- # ls -l /
运行ssh登录,发现不能登录。使用netstat -tlunp发现ssh端口没有监听中,使用systemctl status sshd发现服务没有启动,启动sshd服务时发现不能启动,下面查找原因:
发现密钥文件的权限还是777,没有还原:

下面设置密钥文件权限:
- # chmod 644 /etc/ssh/ssh_config
- # chmod 600 /etc/ssh/sshd_config
- # chmod 640 /etc/ssh/ssh_host_rsa_key /etc/ssh/ssh_host_ecdsa_key /etc/ssh/ssh_host_ed25519_key
- # chmod 644 /etc/ssh/ssh_host_rsa_key.pub /etc/ssh/ssh_host_ecdsa_key.pub /etc/ssh/ssh_host_ed25519_key.pub

下面再次启动sshd试一下:
- # systemctl enable sshd --now
- # netstat -tlunp
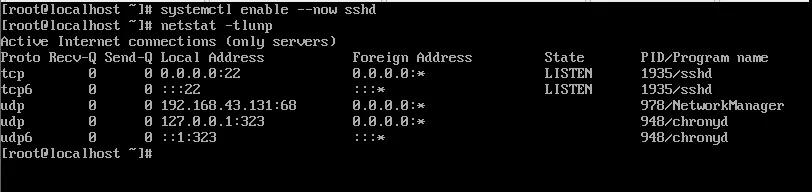
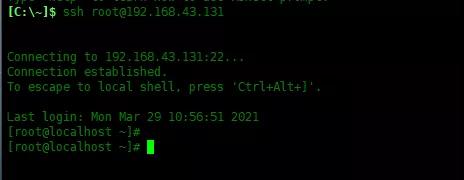
可以看到启动成功了。ssh远程登录试一下,看到登录成功了。
总 结
就这样,我们已经成功还原了已安装的RPM软件包的权限并恢复了服务器。切勿在任何文件系统或配置上使用chmod 777。
本文转载自微信公众号「Linux就该这么学」,可以通过以下二维码关注。转载本文请联系Linux就该这么学公众号。

评论暂时关闭