check_mk linux agent安装
check_mk linux agent安装
check_mk linux agent安装
在要监控的Linux服务器上,先安装xinetd
[plain]
apt-get install xinetd
安装agent
[plain]
dpkg -i check-mk-agent_1.2.2p1-2_all.deb
/etc/xinetd/check_mk文件会自动安装好。
重新启动xinetd
service xinetd restart
现在在icinger server上运行命令,测试一下能否联通:
check_mk -d agent-host-server
通过后在icinga server上/etc/hosts中添加主机名和IP
10.112.18. 131 StaticFileServer
然后编辑/etc/check_mk/main.mk文件
[plain]
all_hosts = [
"localhost",
"StaticFileServer"
]
也可以直接写IP地址,我有一台服务器用hostname连接时断时续, 用IP倒很好。没有问题。
然后再运行cmk -I
[plain]
cmk -I
cpu.loads 1 new checks
cpu.threads 1 new checks
df 2 new checks
diskstat 1 new checks
kernel 3 new checks
kernel.util 1 new checks
lnx_if 1 new checks
mem.used 1 new checks
mounts 2 new checks
tcp_conn_stats 1 new checks
uptime 1 new checks
运行cmk -O
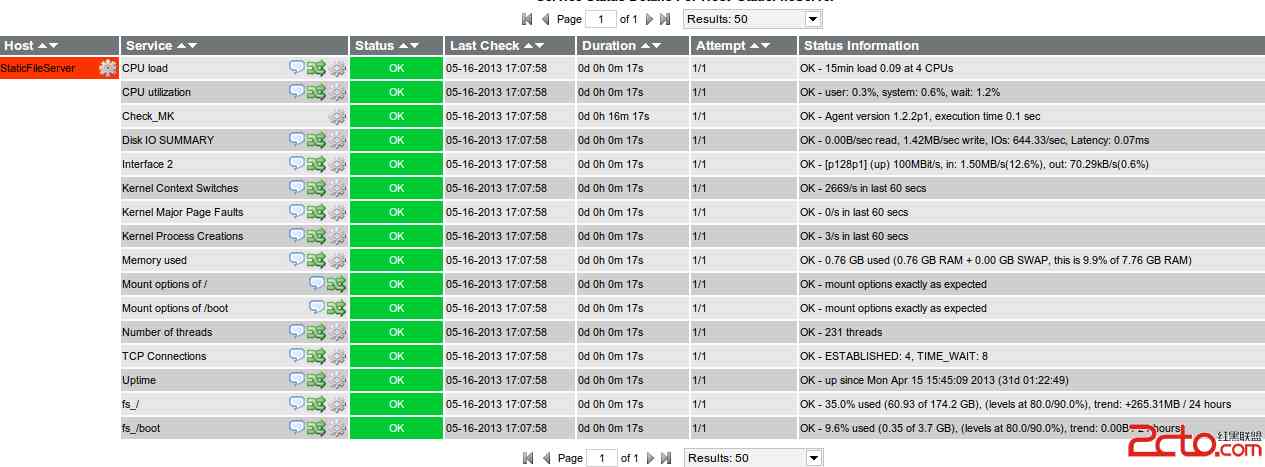
现在打开站点看icinga网站,注意不是check_mk网站。看到:
评论暂时关闭