Nginx之13运筹帷幄 - (VeryNginx),
Nginx之13运筹帷幄 - (VeryNginx),
什么是VeryNginx
VeryNginx 基于 lua_nginx_module(openrestry) 开发,实现了高级的防火墙、访问统计和其他的一些功能。 集成在 Nginx 中运行,扩展了 Nginx 本身的功能,并提供了友好的 Web 交互界面。
如何安装VeryNginx
Nginx编译环境
yum -y install gcc gcc-c++ git pythonNginx基础依赖
- pcre
- openSSL
- zlib
# 可采用yum的方式进行安装
yum -y install pcre-devel openssl-devel zlib-devel
# 可采用源码的方式进行安装
# pcre 2-10.32
wget https://ftp.pcre.org/pub/pcre/pcre2-10.32.tar.gz
tar zxvf pcre2-10.32.tar.gz
# zlib 1.2.11
wget https://nchc.dl.sourceforge.net/project/libpng/zlib/1.2.11/zlib-1.2.11.tar.gz
tar zxvf zlib-1.2.11.tar.gz
# openssl 1.0.2p
wget http://distfiles.macports.org/openssl/openssl-1.0.2p.tar.gz
tar zxvf openssl-1.0.2p.tar.gzVeryNginx依赖
使用到了以下模块,自己编译 Nginx 时,需要包含以下模块才能正常使用。
- http_ssl_module
- http_stub_status_module
- lua_nginx_module
http_ssl_module 和 http_stub_status_module 只需要在编译时加上此项目即可# LuaJIT 2.1.0
wget http://luajit.org/download/LuaJIT-2.1.0-beta3.tar.gz
tar zxvf LuaJIT-2.1.0-beta3.tar.gz
cd LuaJIT-2.1.0-beta3
make && make install
# 环境变量
export LUAJIT_LIB=/usr/local/lib
export LUAJIT_INC=/usr/local/include/luajit-2.1/# ngx_devel_kit 0.3.1
wget https://github.com/simplresty/ngx_devel_kit/archive/v0.3.1rc1.tar.gz
tar zxvf v0.3.1rc1.tar.gz# ngx_lua 0.10.14
wget https://github.com/openresty/lua-nginx-module/archive/v0.10.14.tar.gz
tar zxvf v0.10.14.tar.gz 编译安装 Nginx
# 下载nginx源码包
wget http://nginx.org/download/nginx-1.15.9.tar.gz
tar -xzvf nginx-1.15.9.tar.gz
# 配置编译参数
./configure --prefix=/usr/local/nginx \
--with-ld-opt=-Wl,-rpath,/usr/local/lib/ \
--with-http_ssl_module \
--with-http_stub_status_module \
--add-module=../ngx_devel_kit-0.3.0 \
--add-module=../lua-nginx-module-0.10.11rc2
# 用yum去解决nginx依赖时不用指定下面三个编译项
--with-pcre=../pcre2-10.32 \
--with-zlib=../zlib-1.2.11 \
--with-openssl=../openssl-1.0.2p # 编译及安装
make -j4 & make install安装 VeryNginx
git clone https://github.com/alexazhou/VeryNginx.git
cd VeryNginx
python install.py install verynginx
# 更新 Nginx 配置文件
vim /usr/local/nginx/conf/nginx.conf
# 在 全局 配置段中加入:
include /opt/verynginx/verynginx/nginx_conf/in_external.conf;
# 在 http 配置段中加入:
include /opt/verynginx/verynginx/nginx_conf/in_http_block.conf;
# 在 server 配置段中加入:
include /opt/verynginx/verynginx/nginx_conf/in_server_block.conf;include /opt/verynginx/verynginx/nginx_conf/in_external.conf;
http {
include /opt/verynginx/verynginx/nginx_conf/in_http_block.conf;
server {
listen 80;
server_name localhost;
include /opt/verynginx/verynginx/nginx_conf/in_server_block.conf;
}
}登录 VeryNginx
浏览器访问 http://Server_Name/verynginx/index.html
默认用户名和密码都是 verynginx
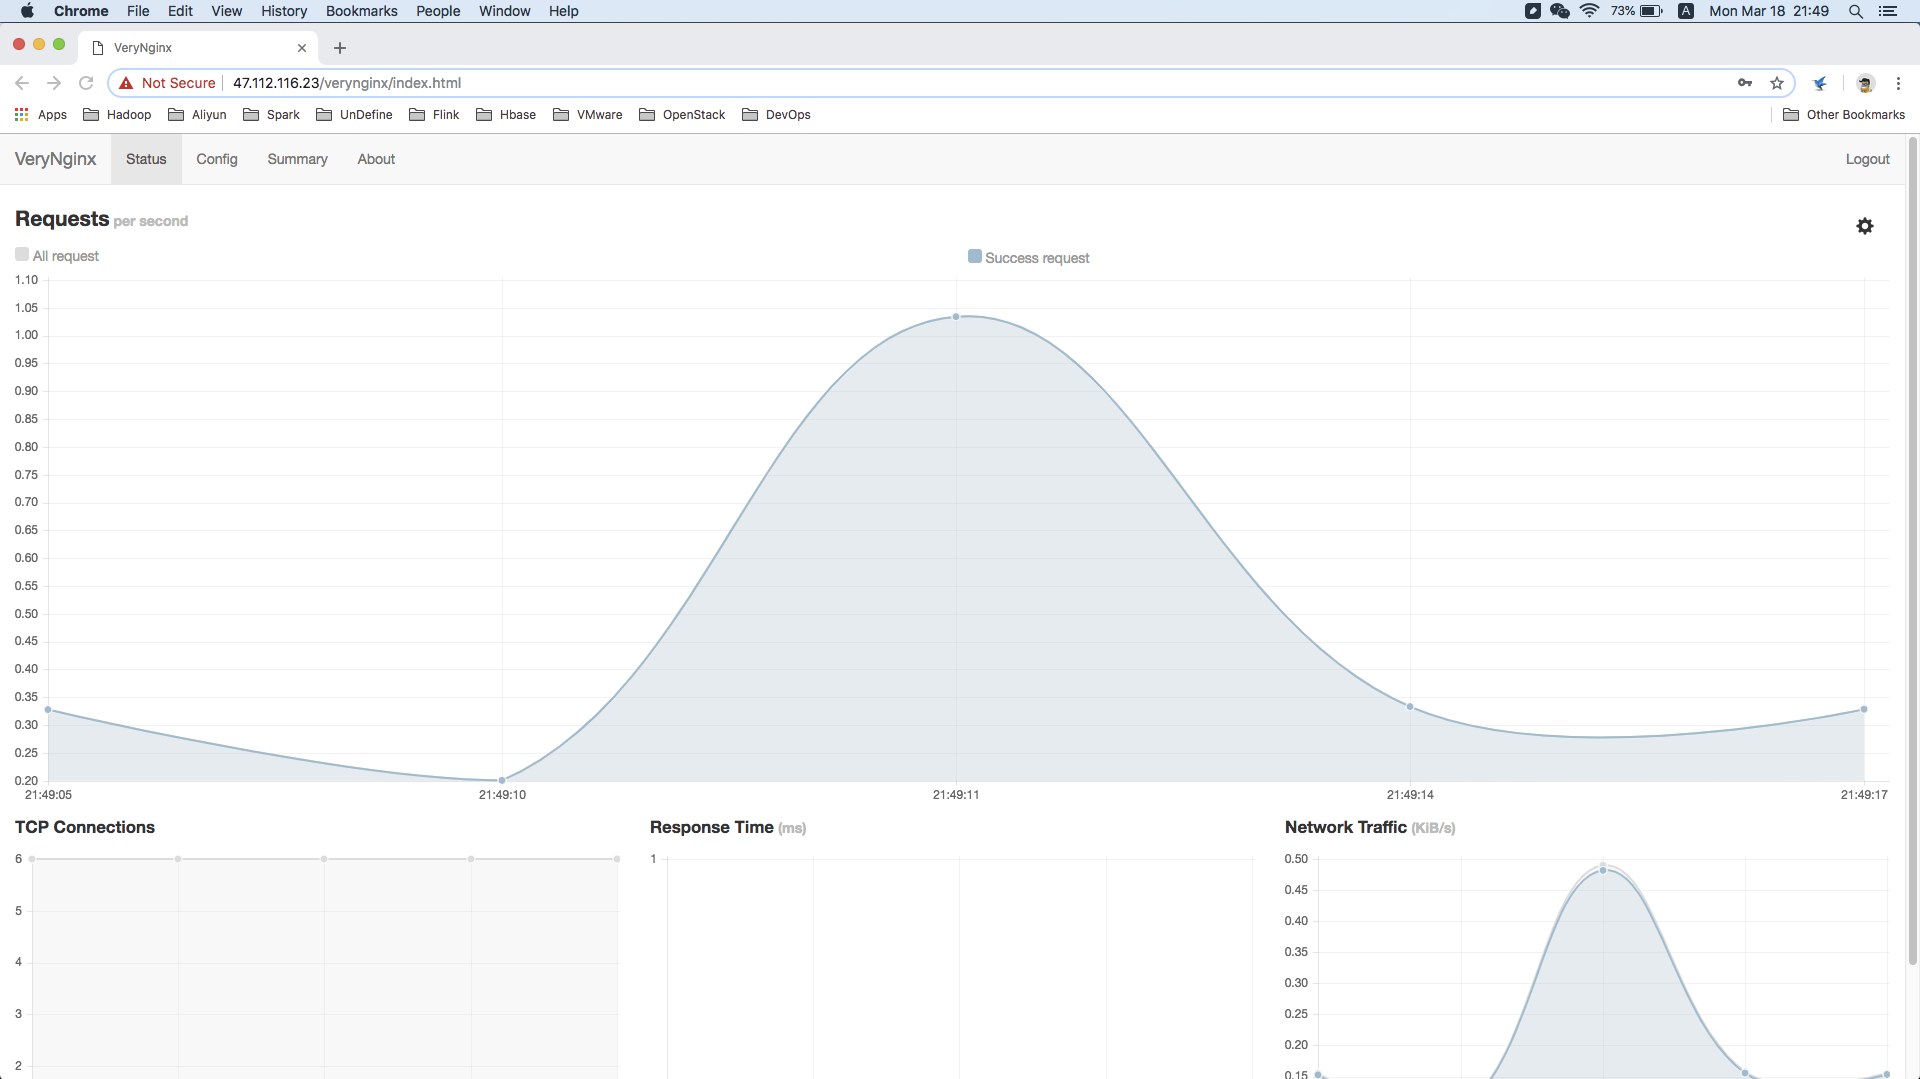
在这个Dashboard中,可见到目前TCP连接数及响应时间和网络流量等相关数值,在Config中也可以根据相应用户请求进行进行一些规则匹配实现自定义防火墙的功能。
评论暂时关闭